


What Our Customers Are Saying
Amazing company that does very good work! Great customer service! - Chad Hughes
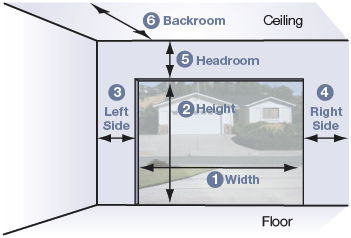
During construction of a new residential garage, it is the intention of many building owners to have a garage door operator installed as part of the new construction activities. This affords the builder or contractor the opportunity to “pre-wire” for the garage door operator, including concealing the wiring if requested. DASMA, in cooperation with the International Door Association (IDA), has created a recommended method for providing wiring taps for garage door operators during new construction of a residential garage. The information contained in this Technical Data Sheet is intended to be distributed to general contractors and builders, who can coordinate pre-wiring activities with electrical contractors and subcontractors.
It should be noted that placement of wiring should comply with the applicable provisions of the National Electrical Code (NEC), and/or state and/or local requirements, that govern the project being undertaken.
Do not run any low voltage control wires close to the 120-volt power line. Do not run any wires through the same holes as the 120-volt power line in studs or cross ties. Either of these conditions will not comply with the NEC and may interfere with safe operation of the garage door operator.
Header-Mounted Operator Detail
Note: Figure 1 provides details for a right-mounted operator. Plan prewiring to accommodate “right”, “center” or “left” header- mounted operators and adjust accordingly.
Note: includes guidelines for operators such as jackshaft operators. Refer to manufacturer’s instructions to find specific guidelines governing placement of wiring.
You will need 3 lengths of 2 conductor color coded minimum 22 gauge bell wire (phone wire) suitable for Class 2 installation. In Canada, this wire must be CSA certified.
Determine if the operator is to be left-mounted, center-mounted or right-mounted.
These wires connect the garage door operator power unit to two photoelectric sensors. For proper operation, photoelectric sensors must not be installed higher than 6 inches above the floor. Wiring must accommodate this installation requirement. Position wires #1 and #2 at about 6 inches from the floor, leaving 24 inches of extra wire. Run wire up each side of the garage door opening, and then back to a location appropriate for the type of mounting.
Left-, center- or right-header-mounted
Leaving 24 inches or more (depending on ceiling height) at the power unit location.
This wire connects the power unit to the wall push button. Note that the wall push button must be installed away from any moving parts and at a minimum height of 5 feet above the garage floor to be out of the reach of children. Run wire from expected push button location to where Wire #1 and Wire #2 are located, leaving 24 inches of extra wire at both ends.
The 120-volt duplex electrical outlet must be adequately separated from the low voltage wiring, located right, center or left for the type of installation. The circuit must be grounded.
Rail-Mounted Operator Detail
Note: includes guidelines for operators commonly installed in residential applications. Refer to manufacturer’s instructions to find specific guidelines governing placement of wiring.
You will need 3 lengths of 2 conductor color coded minimum 22 gauge bell wire (phone wire) suitable for Class 2 installation. In Canada, this wire must be CSA certified.
These wires connect the garage door operator power unit to two photoelectric sensors. For proper operation, photoelectric sensors must not be installed higher than 6 inches above the floor. Wiring must accommodate this installation requirement. Position wires #1 and #2 at about 6 inches from the floor, leaving 24 inches of extra wire. Run wire up each side of the garage door opening, and then back to a location appropriate for the type of mounting
Approximately 10′-6” ( increased by one foot for every 1’ in door opening height above 7’) from, and centered with respect to, the opening
Leaving 24 inches or more (depending on ceiling height) at the power unit location.
This wire connects the power unit to the wall push button. Note that the wall push button must be installed away from any moving parts and at a minimum height of 5 feet above the garage floor to be out of the reach of children. Run wire from expected push button location to where Wire #1 and Wire #2 are located, leaving 24 inches of extra wire at both ends.
The 120-volt duplex electrical outlet must be adequately separated from the low voltage wiring, located approximately 10’-6” (increased by one foot for every 1′ in door opening height above 7′) from, and centered with respect to, the garage door opening, to power the garage door operator. The circuit must be grounded.
Amazing company that does very good work! Great customer service! - Chad Hughes